


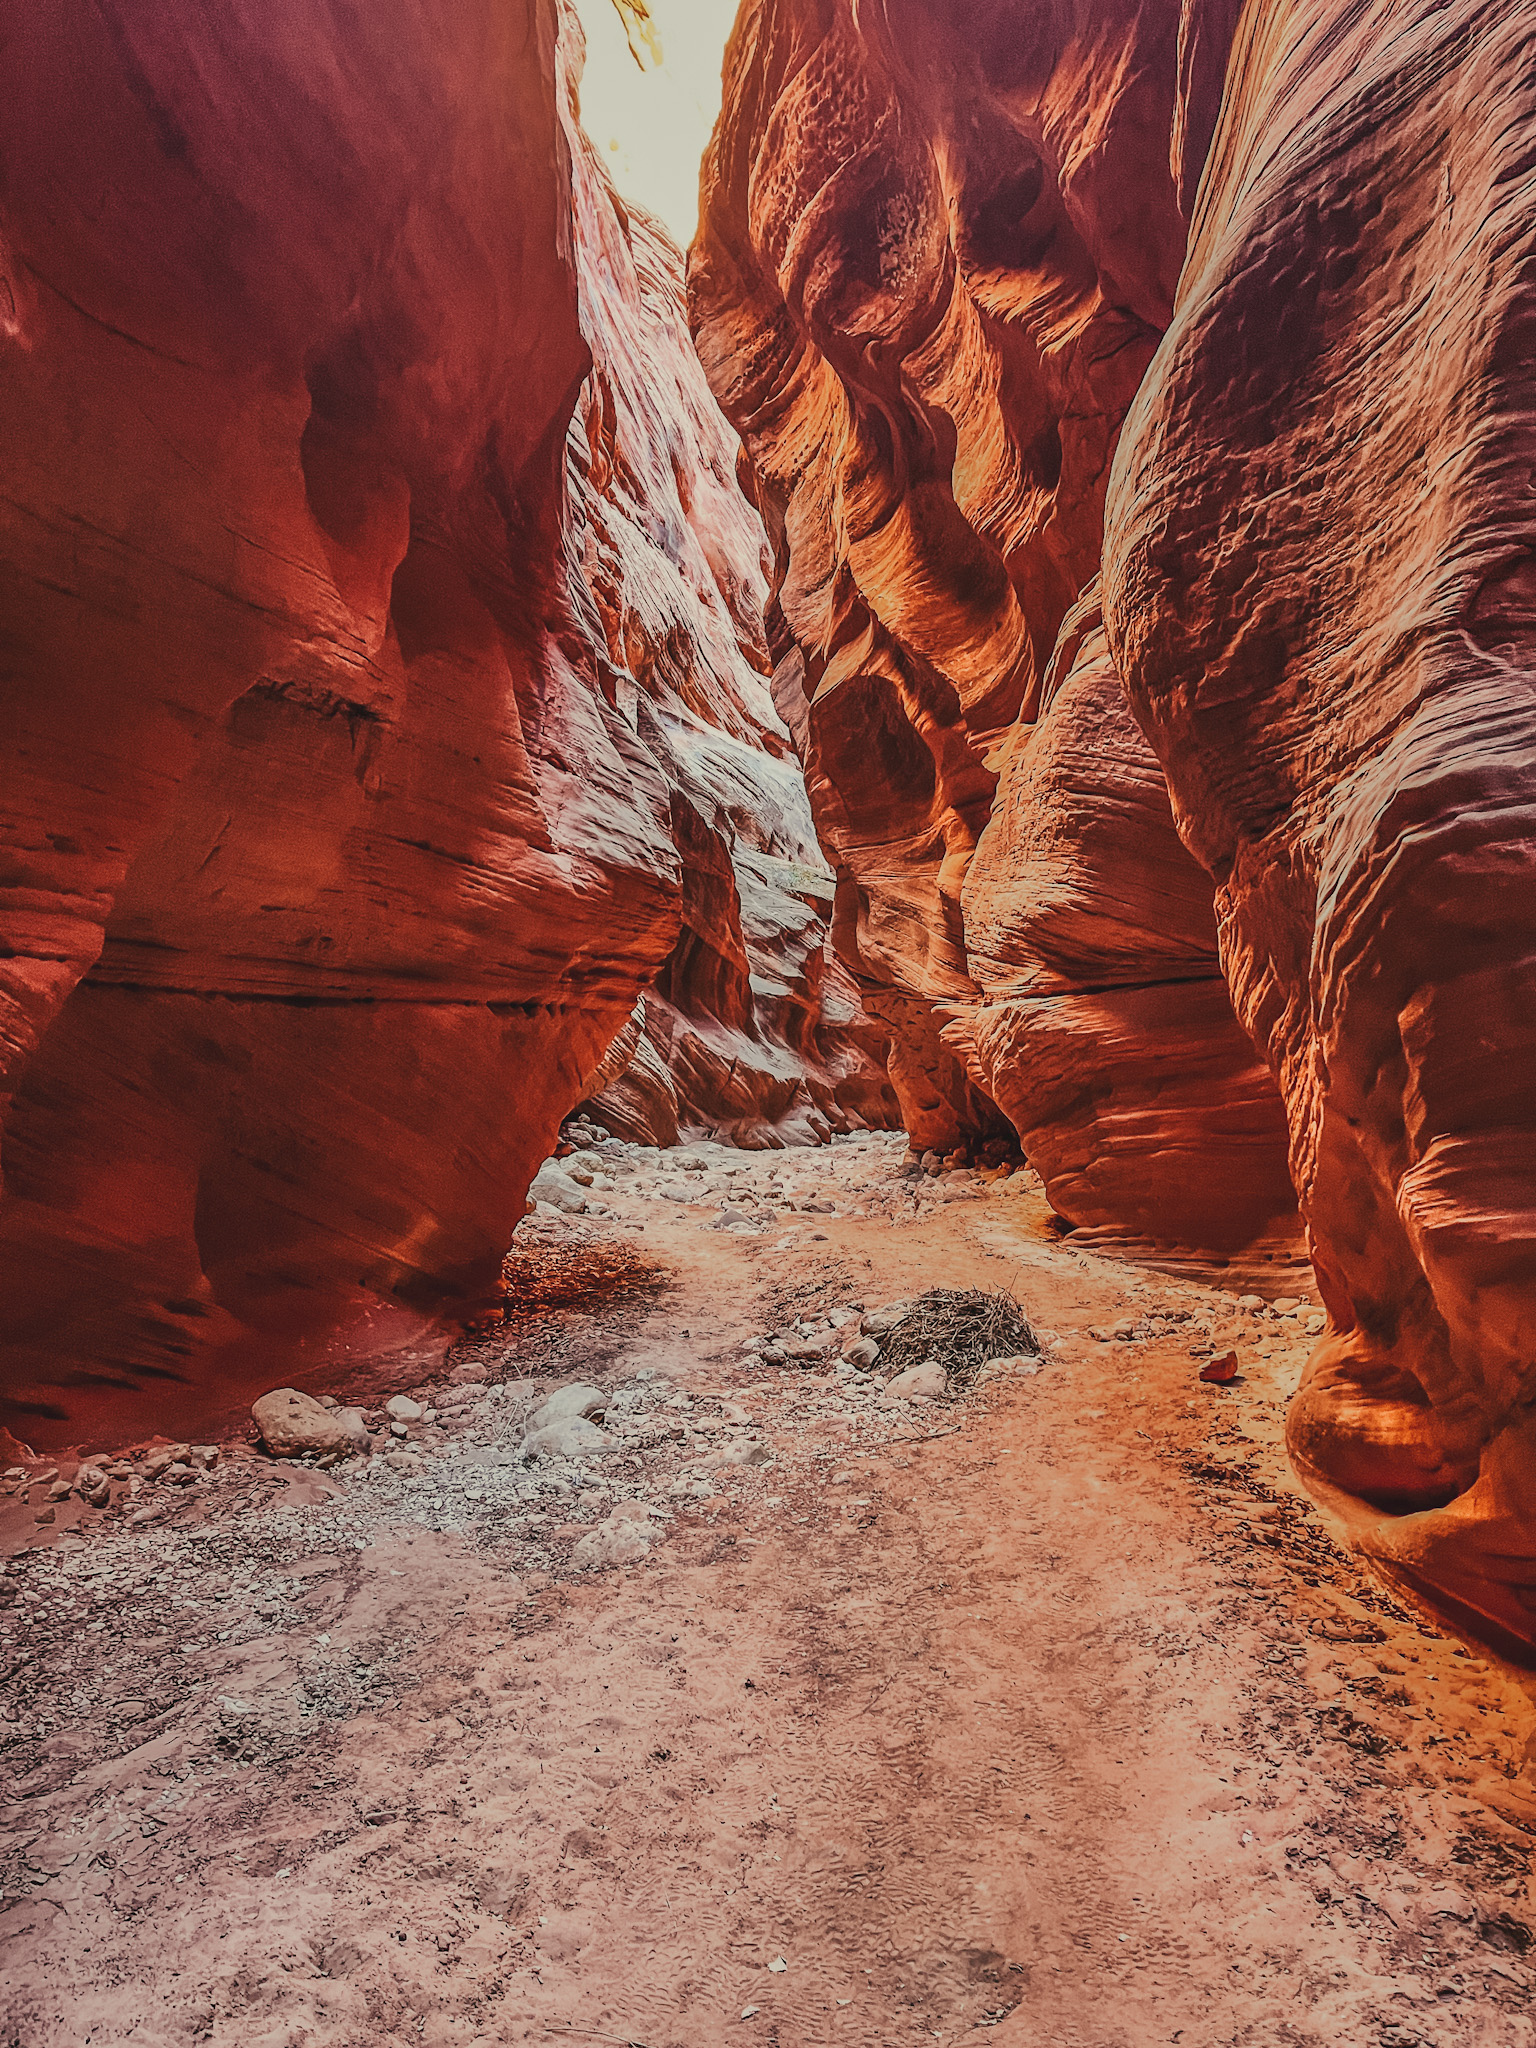
Most people visit Page, Arizona to see Antelope Canyon, the area’s highlight. The pictures of majestic rays of the sun hitting the falling red sand are awe-inspiring. We all want to see it in person and get that shot ourselves. But seeing that bucket shot is rare. It’s a seasonal and time-of-day thing that is weather permited. Everything must line up perfectly for a chance to see the pictures in person. Something we didn’t fully realize when planning a visit.
If time permits, you can add a few minor hikes for a one-to two-day visit. But that’s the end of most people’s exploration of the area. Many vist from Kanab or Moab and make Page a day trip. But there is much more to see and do here. A one or two-day visit is not enough. Let us show you that 1 week should be dedicated to visiting Page, Arizona and its surrounding area.
Day 1
Check out the Visitors Centre
Ask questions in the center about things to do and see. Ask specifically about parking and which roads may need a 4X4.
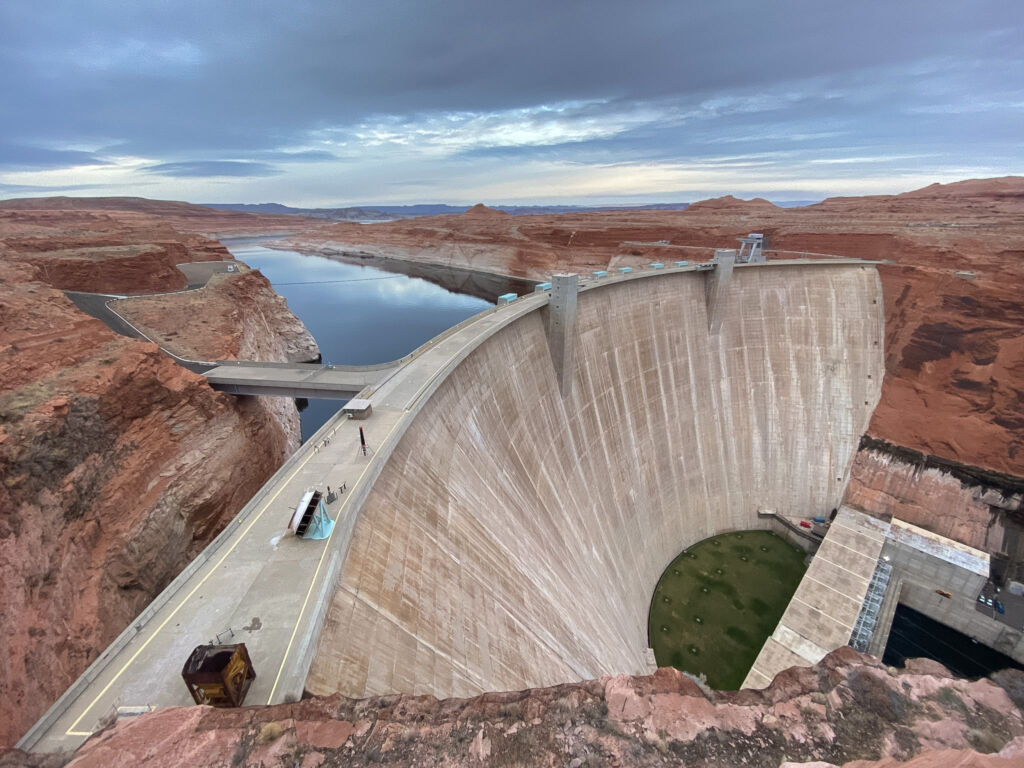
Check out the Glen Canyon Dam
Glen Canyon National Recreational Area/ Lake Powel photo spots.
Watch the Sunset from the Dam Overlook spot and take photos.
Page Visitors Center
The first stop of the day is the Visitors Center. They have updated road conditions and information on flooded trails. Make sure you know how to stay updated on flash flood possibilities. Inexperience in these areas has proven to be life-threatening to tourists.
There is a lot to do in and around Page. The visitors center can make recommendations based on your fitness level. Much of what you can visit will also depend on your vehicle clearance.
Many of the sites and trailheads need a High Clearance vehicle and or 4WD to access. Sometimes these roads can be accessed with a low-clearance 2WD car. But this depends on the time of year and the weather. Mud will make most roads inaccessible, and failing to make wise choices will get you stuck. So make sure to track the weather as most areas do not get cell service. Be prepared.
When we visited, we missed some of the things we wanted to see as we were in a 2WD vehicle. We thought this would mean most of our time would be spent inside on computers as a result. But speaking to the Ranger helped us find several other places we could still see with our small 2017 Chevrolet Spark.
Glen Canyon Dam and Carl Hayden Visitors Center
Before leaving the Visitors Centre, make sure not to miss Norman Rockwell’s Glen Canyon Dam painting, on display. It really gives a feel for how the world of these people dramatically changed with the Dam. Their world would never be the same after its construction.
After the Visitors center, you are going to be heading to the second-largest dam in the United States. Standing at 710 feet above the bedrock, the Glen Canyon Dam is a site to behold. It makes you feel small when you are on the bridge admiring this engineering wonder. The dam was constructed between 1956 to 1966. It provides water and power needed by people in the Western United States. It completely changed the landscape of the area, creating the beautiful Lake Powell, and opened up many of the hikes now available in the canyons of the area.
Take a walk along the bridge to get a great view of the dam. Cross the street to get an incredible view of the canyon now visible because of the dam. Depending on the time of day, you will see many people walking along the bridge taking in the view. After you check it out, head over to the Carl Hayden Visitors Center. This is the visitors center next to the Dam.
The visitors center offers a plethora of information. Learn about the history of the area, how water was brought to the west, water conservation, and dam facts. There are interactive displays and a great video. Depending on the time of year you are visiting, you can get a tour of the dam. It also acts as a pseudo visitors center for the Glen Canyon National Recreational Area. If you have yet to visit the Page Visitors Center. You can also get information about road closures and hikes in the surrounding area. Be advised that this visitors center is open Monday to Thursday and closed from Friday to Sunday. Expect to spend an hour plus here to take in all the information.
The Vistas of Lake Powell from within Glen Canyon National Recreation Area
After you learn about the dam and Lake Powell, it’s time to jump back into your car and head to some great vista spots. You will find several lookout spots in a short drive up Highway 89 toward Utah. They are great photo stops and give a sneak peek of the incredible area you will be exploring over the next few days.
Your first stop is Wahweap Overlook. This spot is up a long road that takes you to a peak which overlooks the entire area. Here you will see the breathtaking views of the red and white rock formations. They line Lake Powel and further out Wahweap Bay. This is a great spot to check out the sunset. Rather than watching the sunset you are watching the colours dance on the rocks. Changing colour as the sun goes down. It is like an ever-changing painting.
After taking in the Lake Powell vistas from above, hop back in your car. A short drive down the road is Wahweap Viewpoint. This time we get a closer view of Lake Powel and the surrounding area. The views from here are stunning. You can see the white rocks reflect off of the water. They create some amazing photo opportunities. You can also get a clearer view of Wahweap Marina and the beach along Lake Powell. Depending on the time of year, you can stop at the beach as well. It is a popular local spot to go for a dip in the gorgeous lake. These viewpoints can be accessed with your national park pass.
We were here in the wintertime time so only took in the views and the incredible reflections on the water. But the beach is very popular in the warmer months for both locals and tourists alike.
If you’re still looking for another vista to take in, head over to the Navajo Mountain viewpoint. Here you can see more of how the lake has carved its way through the rocks. There is a little covered bench and it’s a quiet stop as most tourists miss it.
After enjoying the viewpoints it’s time to put on your hiking boots and hit the trail.
The New Wave
Head back toward the Carl Hayden Visitors Center. Make your last right before the highway curves down to the visitor’s center. After a short drive on a dirt road, you will come to the Beehive Campground. Park here and get ready for an awesome hike. The trailhead is not clearly marked but if you follow the map to the campground, you can see cars here from the road. This is a great and simple alternative to The Wave hike which requires a permit.
The New Wave does not require a permit. It is easily accessible and short trail. The Wave, however, has become so popular that you have to participate in a lottery to obtain a permit. Even with a lottery win, bad weather can block vehicle access to the trailhead. Permits require either months of early planning or last-minute luck. All entries in the lottery will require a nominal fee. Last-minute entries are only possible for local visitors as it is GPS locked. So you are unable to enter the lottery before you arrive in the area. All hikers will need to attend a briefing session before hitting the trial. To put it simply, this trail requires a lot of timing and great planning.
But it’s time to see the New Wave. This one is a great starter hike for the area. The trail has stones placed along the way. Not with rock cairns, but with small pebbles that form a path along the rock. (have a picture of this) It’s easy to follow as long as you are paying attention. You start with a small climb up a rock face. When you hit the top, you get a small glimpse of what is to come. In the distance, you can see rock formations that seem to have been created with a large paintbrush. They look to have the small strokes from bristles of a brush all over the sandstone. The placed stone trail and the view in the distance almost pull you forward to discover what lies ahead. When you come to the first fork in the trail, go left.
This left path will take you off of the “main trail”. It leads to a more secluded spot. It offers some great photo opportunities and incredible views. There are a few minor scrambles to get further out here but it is worth it. This spot is also another great place to watch sunset if you are here later in the day. After you have taken some great photos and enjoyed the awesome view. Head back to where you veered on the trail and continue following the main path.
The New Wave is an easier trail. But you can increase the challenge of it as you like. There are many options to scramble up the wavy rock surfaces further into the trail. Or practice your rock-climbing skills. It is a great trail to start your exploration of the area. Expect to be here from 1.5 – 4 hours. Depending on how much time you are dedicating to photos and exploring the formations. The trail itself without stops is 35-45 min.
Stay at the loop end of the trail to take in the incredible sunset. It is a site to behold watching the colours change off of the formations. It is like a show watching the patterns created by the shadows in the valley. If you would rather be off the trail before the sun goes down, head back to the Wahweep Overlook to take in the sunset. Either is amazing, but I recommend staying on the trail if you are comfortable. Blue hour will allow for enough light to make it back to your vehicle without issue.
Day 2
Toadstool Hoodoos trail
Wireless to Buckskin Gulch trail
Toadstool Hoodoos Trail
Today you are headed to Utah for 2 great trails. The drive to both is very scenic so if you have a GoPro you will want to bring it along. The first trail is only a 30-minute drive from Page and takes you to some very alien formations. We found the trail starting point a bit difficult to find from the parking and ended up in the wrong place. We later joined the trail about 5 minutes through the bush.
Toadstool Hoodos Trail is located in Grand Staircase-Escalante National Monument. It’s an easy out-and-back that takes about 40 minutes on average. You will most likely be here for longer because of the pictures, not because of the trail length. There are some fascinating rock formations to take photos of. The trail starts off going through a wash with high peaks on your left. It’s not the most interesting of views but there are some spots to stop along the way and take photos. Please make sure to conserve the formations for all visitors to enjoy. The soft delicate formations are easily toppled and destroyed.
Follow the wash until you come to a point where it looks like the wash goes deeper than calf height. Here it will look like you “could” climb up above it on the right. That is the correct path. Climb up to the right and keep heading along the ledge around the bend. If you had stayed in the wash you would have come to a dead end and would have had to climb out of it or circle back. But only by a few minutes.
Head straight past the bend. You will notice the landscape starts to change. Suddenly you are in the sand surrounded by white rocks. Many of the areas with vegetation are blocked off to protect them and help them grow. From here you will spot your first hoodoos. Perched atop a small peak is the alien-looking formation. Over time, Dakoda Sandstone Boulders become caps. This happens when the softer Entrada Sandstone erodes beneath them. This creates strange formations called hoodoos. Or as we see them, little aliens.
There are several in the area so take a walk around to admire them all. They are all quite different. Depending on lighting conditions you can get some great shots. They cast some cool shadows. We suggest climbing around to get a different perspective on each of them. Just be sure to stay off the hoodoos. The rock seems to be caked with dried mud, so sometimes what looks like rock will just break away under your feet. The drop is often a long way down.
Keep following the trail to see the different formations. Check out the views from the back part of the trail. They offer some epic vistas of the Utah landscape. After enjoying the trail, head back to your car. It’s time to head to the second trail of the day, and it’s a long one. So the earlier the better.
Wire Pass to Buckskin Gulch Trail
Continue down Highway 89 away from Page and make a sharp left at The Cockscomb. Follow the dirt road until you come to the Wire Pass Trailhead. Not Buckskin Gulch trailhead, which will appear first. You are headed to Buckskin Gulch via Wire Pass. This is a 3 – 5.5 mile trail and the quickest access for a day hike of Buckskin. The 23-mile Buckskin Gulch is the longest and deepest slot canyon in the World. But doing the whole trail from start to finish will need preparation and 10-13 hours to complete.
The canyon is incredible and feels like it goes on forever. It offers amazing views with twists and turns. It will make you feel like you are on a journey to an undiscovered world. The walls in the canyon can reach up to 400 feet high in some places leaving you awe-struck at the sheer size.
Keep your eyes peeled along the trail. You will spot some petroglyphs amongst the massive canyon walls. Especially when you come to the large T split. The hike will take a while and it’s worth every step. The trail does require a permit, it can be easily obtained online for $6.00 per person. We purchased the permit online at the trailhead parking before heading out on the trail when we went. But we were lucky to get a signal and it was very weak.
This trail is incredible but can be dangerous. Make sure to check weather conditions before you head out. If there is any sign of rain do not go. The canyon can fill with water quickly and there you will be left with no escape route. Very few places make climbing to safety a possibility. Make sure to bring lots of water and snacks with you. It is not a technical trial by any means but you will need to prepare. Let someone know when you are planning on heading out on the trail and keep an eye on the weather. You should also download a map of the trail so you have an idea of where you are on the trail. Not every split in the trail is clearly marked.
Wire Pass via Buckskin allows you to skip a big chunk of the trail. It will still allow you to see the amazing Slot Canyon. It is much shorter than the entire Buckskin Gulch trail. But you can continue through the Buckskin trail if you like. If you choose to complete the Buckskin Gulch trail, remember it is a very long trail. It will take you most of the day, and you will most likely need to camp at the other end of the trail. If you do this it will require a permit. It is possible to do the entire thing out and back but you will be starting very early and ending late.
Whatever you decide, this trail is a great alternative to Antelope Canyon. It was a highlight for us when we were here and we want to go back to tackle the whole thing next time.
After a long day on the trails head back to Page for some dinner and get some rest. If it’s still light on your way back hit one of the pullouts to enjoy the sunset. We were racing the sun on our visit to make it back to the car and our drive back to Page was in the dark. You don’t want to be in the canyon in the dark, so plan efficiently.
Day 3
Navajo Bridges
Lees Ferry
Spencer Trail
Antelope Pass Vista
Navajo Bridges
Today, you’re visiting a historic site that connects Utah and Arizona. This location features one of seven land crossings along a 750-mile stretch of the Colorado River. The Navajo Bridge, built in 1929, was designed for vehicles to safely cross the river. It offered a better alternative to the ferry crossing at Lees Ferry. Which was the primary means of crossing the river at that time, however dangerous.
From its construction, the Navajo Bridge served as the main crossing for vehicles. With vehicles weighing more and more and becoming wider, it was no longer the safest option. The bridge was closed to pedestrians, yet this did not stop people from still crossing on foot. This caused a lot of problems for both drivers and pedestrians alike. So the decision was made to replace the bridge.
In 1993 that bridge was constructed. Aimed to better serve the demands of vehicular traffic. The original bridge was made a pedestrian-only bridge. You can see the visitors’ center here to learn about the history of the bridges. The information panels tell about how and where people used to cross the river and its effects on the area. The rangers are great at recommending other noteworthy attractions in the area. They also have a store and a park stamp if you collect them.
It is an excellent first stop for the day. Offering incredible views of the Grand Canyon and Colorado River. If you are lucky, you will spot the endangered California Condor. The bridge is close to the Vermillion Cliffs, which is where the Condors were released into the wild in 1996. This was part of an attempt to make sure they did not become extinct. The program releases full-grown ones yearly to build up the small population. They tend to hang out on the bridge to rest. Spotting them can be a rare occurrence. This is because there are only approximately 529 currently in existence. But if you see them, they are a site to behold. With a wingspan of up to 3 meters, they are massive. Even from far away, they can be spotted, but they are quick and hard to capture on camera.
When we were we spotted 2 hanging out under the bridge. We managed to watch them for a while as they slowly made their way across the under of the bridge. They ended up perching up on some rocks on the Utah side before taking off to hunt in the area. They were incredible and we highly recommend sticking around the bridge to try and spot some.
Depending on the time of year of your visit, you may find vendors posted up in the parking lot. They will be selling Navajo goods like hand-crafted jewelry and clothing. When we were here in the winter only 2 people were selling some items out of their trucks. But there were tables and stalls suitable for a mini market.
Lees Ferry
After reading up on the history of the incredible bridges head back to your car. It’s time for a short but incredibly scenic drive to Lees Ferry. It is the only place for a 260-mile stretch where sheer canyon walls do not flank the Colorado River. This made it the perfect place for crossing the river before Navajo bridges were built.
There are several great hikes in this area. Some of these include Spencer Trail and Cathedral Wash. Spencer Trail will give you incredible views of the surrounding area. It’s a short 4 mi hike but has a rough elevation gain. At the trailhead, you will find the remnants of the Lonely Dell Ranch. You will see bits of steamboats left over from when Lees Ferry was the only crossing of the river. Following this trail is relatively easy. Once you start gaining elevation, you will be walking by sheer cliffs on the switchbacks. At the top, you will find the lookout of Lees Ferry. It offers an incredible view of the Colorado River winding through the canyon. (add parking link)
Cathedral Wash Trail is a canyon hike. It takes you through a deep wash down towards the Colorado River. You will feel small working your way down through the canyon. As you make your way further down you will hear the roar of the rapids in the Colorado River. The hike is not for the faint of heart but worth it to see this amazing slot canyon. But we love slot canyons.
When we were in this area we did a modified version of the Spencer trail. At the split where you start to climb, we followed the trail along the river instead. Our modified version of the trail took us along the Colorado River which was relatively flat. It was an easy out and back which was about 5 km. The views were incredible along the river. We were the only ones on the trail and when birds flew by you could hear the flapping of their wings echo in the canyon. We had never heard something like that before, it was incredible. You could hear the roar of the boats on their way back down the river too. All sounds echoed, even our voices or drops in the water.
After your hike, it’s time to head back to Page for the day. Make sure to stop at the Antelope Pass Vista on your way back. Here you can take in the Sunset looking over the valley you were hiking in. When we were here it was pretty cloudy. But there were enough breaks in the clouds to offer amazing views. The colours as the sun set behind the Vermillion cliffs were specular. You will most likely find a lot of cars and truckers parked here to take in the sunset. They are all in the know. Wink Face. Here is the GPS map marker for the lookout.
You can find the Antelope Pass Vista here.
Day 4
Page Rimview Trail
Car Canyon
Big Lake Sand Cave
Horse Shoe Bend trail/Sunset
Page Rimview Trail
On day 4 we are getting an early start. We are headed to the Page Rimview trail. It’s a 10-mile beginner-level trail around the rim of Page. It gives you incredible views of the town and surrounding areas. The trail is great for biking, running, and hiking. It’s a great way to start the day due to the relative ease of the hike.
A lot of people will break up the hike over a few days as it is long. But, if you start early you will be done by late morning to mid-day. Going early gives you great views of sunrise and is much cooler. There are no shade spots on the trail so you want to do it in the early morning or late afternoon into the evening. Make sure to bring lots of water and some snacks. It’s a great way to start the day by stretching your legs which may be tight after the hiking you have been doing.
Car Canyon
After this beautiful morning hike, hop back into your car to head to an interesting photo spot. This often overlooked spot offers some insights into Page’s history.
After the construction of the Glen Dam, locals in Page didn’t have jobs to go to. A lot of them up and left the town abandoning their vehicles. The town didn’t want a bunch of abandoned vehicles around so they decided to push them into a canyon nearby. The town’s “solution” has created an interesting spot to view and take some great photos. Car Canyon is the most accessible spot to see the vehicles that do not need a repel.
To get here head to the animal shelter. Park beside the yellow-chained barriers and head down the hill. A short walk from here you will find the Car Canyon. Veer right and you will see the cars appear. The juxtaposition of the junk cars with the arid background is both beautiful and sad. When we were here we stayed for a while to get shots at various stages of light. The stop can be as long or as short as you want. If you follow the canyon from above there are some spots where you could carefully work your way down.
The dogs at the shelter will definitely make your presence known, so be prepared for the barking. The staff are helpful and have no issues directing you down the small canyon. After exploring this interesting spot for a bit, hop back into your car to head to a quick photo spot.
Big Lake Sand Cave
A short hike behind a Shell gas station is Big Lake Sand Cave. A beautiful small cave with great potential for some amazing photos. It is not what it is hyped up to be so don’t expect what you see on Instagram. But it’s worth a short stop. Be sure not to hop any fences to get here. The area is sacred Navajo land please only walk where permitted.
Park your car at the rear of the Shell gas station and head out to the back area. On the right, you will see a little path with footprints in the sand that lead to the cave. Walk along the fence until you see a spot where the fence permits entry. Follow the trail up a small hill to the mouth of the cave towards the left.
From here you will see a large sand dune in the center of the cave. Walk around the sand dune and head to the back of the cave. Check out the incredible textures of the back wall of the cave. It’s not very large but it is quite beautiful and worth a short stop. Depending on the time you are visiting you will probably find a lot of people here.
You will want to bring a wide-angle lens to this spot for the best possible shots. The best times to visit are in the morning or later in the afternoon. This is due to the lighting conditions. The cave is always beautiful of course. From mid-day through the early afternoon, the lighting will blow out your photos.
You can also walk around the cave to the left as you leave. Follow the rock structure to the back to get some beautiful views of the surrounding area. This is a great spot to scramble up the structure and see more of the formation and textures on the rocks. From this spot, you are between the rocks perched high above the road on the other side of the rocks.
Horseshoe Bend Trail and Sunset
Our final stop for the day takes on a short hike. It leads to an incredible spot in the Glen Canyon Recreational Area. We are headed to Horseshoe Bend. This area is in Glen Canyon but the city of Page owns the parking lot. Because of this, there is a fee to park there. The parking fee is $5.00 for a motorcycle and $10.00 for a car. Page has an ordinance which prevents anyone from parking along the highway. So you must pay the fee to visit the site, but it’s worth the nominal fee.
From the parking, there is a 2.4 km trail that leads you to a viewpoint of the beautiful Horseshoe Bend. It’s an easy walk which takes about 25 to 30 minutes. It’s mostly downhill so coming back up may be a bit of a challenge. But there are several rest stops for you to take a rest if needed. This spot is frequently filled with visitors, but you can spread out and walk along the rim of the bend. It is quite easy to find a quiet spot to take in the views of the area. Here the river snaking around the canyon is the feature. It is breathtaking, especially at sunset. But come earlier for sunset so you can see the sun deep in the depth of the canyon down to the river. Making sure to stay until sunset and the shadows fill the canyon walls.
When we were we spent almost 2 hours taking it in. We walked along the side to find different spots where there were less and less people. Taking some great photos with no one in them. At sunset, this seems to be a popular thing to do. We saw people walking quite far along the edge to find their spot. It can be terrifying as most of the area has no railing. It was not as busy as expected because we were here in January. So if you are planning on going in a peak season, make sure to arrive very early so you can get a good spot for sunset.
Day 5
Lower Antelope Canyon
Upper Antelope Canyon
Scenic Dam Boat Tour
Lower Antelope Canyon
Our first stop for today will take us to Lower Antelope Canyon. This one requires a bit of hiking. The entrance into the canyon takes you down several flights of narrow stairs. Early morning is the best time to visit this canyon. This will allow you to see the incredible colour changes in the formations within the canyon. You will be required to have a guide to visit the canyon. But this will help you spot some of the more interesting shapes while you explore. Tickets must be booked in advance so get a good time slots months in advance.
If the colours are what you are looking for, you should try to visit in the winter months. This is the time when the colours are most prominent. It also has the benefit of having fewer tourists which you may find more comfortable. The colour changes will happen regardless, and they are truly a sight to behold. You will get hues of blues, purples, and pinks. You will feel like you are in another world. If you are visiting in the summer months, expect to see red and orange contrasts in the canyon.
Any time is worth a visit, but we suggest going in the winter. This is because there are fewer people, and the weather is much more manageable. You will also see colours that most people miss. It is a great opportunity to get different photos from the ones you will usually see posted online.
Be advised that the way you enter this canyon is the same way you will exit. Meaning you will have a climb on your way out. When you finish your tour, which is usually 1-1.5 hours, it will be much warmer in the sun. So be sure to come prepared with water.
Upper Antelope Canyon
After exploring Lower Antelope Canyon, head to Upper Antelope Canyon. It’s about 7.5 miles from one entrance to the other. Here we can see the amazing light rays that have made the canyon so famous. But only for summer visitors. Light rays are not visible at the lower canyon in any season.
The Canyons were shaped by the erosion of vibrant Navajo Sandstone. During flash floods, torrents of rainwater sweep through, carrying sand and various debris. This forceful flow carved the canyon walls, creating deep grooves and intricate patterns. Over time, this ongoing erosion has shaped the beautiful textures and unique forms we admire today.
Upper Antelope Canyon is best visited in the late morning to early afternoon hours. This is because the rays of light are most visible during these hours. If getting great photos with the light rays is your goal. Make sure you book your time slot somewhere between 11:00 AM to 1:30 PM.
The canyon is on ground level so walking it is easy. Meaning where you enter and exit with your tour. This is also what makes Upper more popular than Lower Antelope Canyon. The guided canyon hike is about 45-90 minutes. The guides will highlight the interesting spots throughout. As well as the best spots to take photos you explore the incredible canyon.
For either canyon, you must have a guide. There are 5 tour companies offering tours into Upper Antelope Canyon and 2 for Lower Antelope Canyon.
For upper canyon tours, your options are: Antelope Canyon Navajo Tours, Adventurous Antelope Canyon Tours, Antelope Slot Canyon Tours, Antelope Canyon Tours (Carolene Ekis), and Tse Bighanilini Tours.
For the lower canyon your options are Ken’s Lower Antelope Canyon Tours or Dixies Lower Antelope Canyon Tours.
Whichever you choose be sure you arrive a few minutes early to get situated. Tripods, selfie sticks, GoPros, or drones are not permitted in the canyon. On top of your tour fee, there is an $8.00 PP Navajo park fee to enter the canyon. As of publication, it was not included in the listed tour pricing.
We have listed an alternative to these slot canyons as it can be difficult to book both Upper and Lower Canyon. They are quite expensive and are typically the biggest draw of tourists in the area. But, they are the most popular for a reason. They are incredible. If you’re okay with big crowds and possibly expensive tickets, it is worth going to see them.
After exploring both Upper and Lower Antelope Canyon it is time to chill. Our next stop will allow you to sit back and take a relaxing cruise through Wahweap Bay.
The tour leaves from Lake Powell Resort and cruises through the area up to the Glen Canyon Dam. Bring your lunch and enjoy the views through the canyon as you take in the area from the water.
The tour is about 90 minutes long and offers a very different vantage from what you have seen so far. If you go in the summer months, you may be able to have a swim stop along the tour. Regardless of when you go, it is a great way to wind down from all of the walking on the tours earlier in the day.
Day 6
Back-haul Horseshoe Bend
Today will be a long one but a bit more relaxing. Your tour on the previous day was a preview of today. We are renting kayaks and heading down to Lees Ferry. From Lees Ferry, we are back-hauling up to the Glen Canyon Dam. Then floating down this 8-mile section of the Colorado River. This will be an all-day excursion but it is worth every moment.
As you ride the current, which runs at about 3 mph back down to Lees Ferry. Enjoy the majesty of the Colorado River from down in the canyon. You will be going through the river section of Horseshoe Bend at water level. Along the way, you should stop and check out some petroglyphs along the walls by the water. There are many potential spots to stop for a snack or lunch break. If you enjoy fishing, consider getting a fishing license to fish on your way down the river. This section of the river has some of the best fishing in Arizona. If you are up for it try to catch your lunch and make this day’s trip even more adventurous.
This trip is about 6-8 hours, depending on how many stops you make along the river. Make sure to bring enough food and water for the journey. Many camping spots along the river have a compost toilet in case you need it. If you are going in the summer, bring sunscreen as there isn’t much shade. Expect to have a great tan at the end of the day.
If you don’t want to back-haul up to the dam you can still rent the kayaks and paddle up the river to float back down. If you are going to do this you may want to consider making this an overnight trip to camp along the river. It is doable but is quite the workout and depending on your fitness level can double or triple your time out.
Rent your Kayaks and book your back-haul trip here.
Day 7
Our final day in Page will take us to a place that looks out of this world. The road here is tough and requires a 4WD vehicle with high clearance due to stretches of deep soft sand. We are headed to White Pocket in the Vermillion Cliffs.
About 2 hours outside of Page surrounded by the Coyote Butts lays White Pocket. It offers a stark contrast to the red rocks of Coyote Butts as it is mostly white and grey. The rock formations of domes look like brains coming out of the landscape. The rocks look like they have melted in many places, making the area feel all the more otherworldly. There are many holes throughout the terrain that pool water. This offers some great photo opportunities.
It is a rather small area to explore, covering only about 2 to 3 miles. But you will want to give yourself plenty of time. With the intricate landscape, you will want to explore all of the ravines and crevices. Scouting the best possible shots and sometimes waiting for the right lighting conditions.
If you do not have a 4WD vehicle, you can take a tour out here. Several companies offer them but they can be quite pricey so be aware. Standard vehicles may be able to make it most of the way, up until the sandy road. From here you can choose to park along the road and extend the hike by another 2 to 3 miles. Plenty of people decide to do this. But be aware that this will also be weather-dependent. The road may be washed out if it is in a rainy season. Be sure to check at the visitors center for information about the road.
Though most people only spend a night or two in Page there is plenty more this town has to offer. It is a great hub to get to some of both Arizona’s and Utah’s incredible landscapes. There are so many more trails that we did not list. Many of them do need a 4WD vehicle but it opens up the opportunities to explore the area so much more. Page is much more than Antelope Canyon. Have you explored this incredible area? Let us know in the comments below. I cannot wait to go back and see more of the amazing trails and landscapes.
Extras We Wish We Had More Time For
Though most people only spend a night or two in Page there is plenty more this town has to offer. It is a great hub to get to some of both Arizona’s and Utah’s incredible landscapes. There are so many more trails that we did not list. Many of them do need a 4WD vehicle but it opens up the opportunities to explore the area so much more. Page is much more than Antelope Canyon. Have you explored this incredible area? Let us know in the comments below. I cannot wait to go back and see more of the amazing trails and landscapes.
There are even more places that didn’t make the itinerary for a 1-week stay that are worth a visit.
1. The Wave, pending winning the permit lottery
2. Inchworm Arch Hike
3. Buck Tank Draw and Birthday Arch Hike
4. Catstair Canyon East Trail
5. Cobra Arch Trail
6. South Teepees at Vermilion Cliffs
7. Sand Caves Trailhead (if you will not be in Kanab)
8. Red Canyon Slot Aka Peek a boo slot canyon
9 The Belly of the Dragon Tunnel
10. Rainbow Bridge National Monument via boat for the day or multi-day hike
11. Secret Canyon – another local slot canyon